87 Film Filters and 32 Overlays for Photo Albums on iPhone (On-Device)
Open a photo in Pressbook's editor and two shelves open up: filters and overlays. Eighty-seven filters, from clean modern looks to film-inspired grades like Portra 400 and Fuji Velvia. Thirty-two overlays, from film borders to washi tape. Every one of them renders on your device, with the same chain used for the on-screen preview and the 600 DPI export.
No photo is uploaded to apply a filter. No overlay is fetched from a server. The look you design is the look that prints.
Here is what's in the shelves and how to use them.

The filter shelf: 87 looks across 13 categories
The filters are grouped into 13 categories, plus a Favourites tab for the ones you've saved.
- Trending: clean, current looks like Clarendon, Lark, and Juno.
- Film: grades inspired by real stocks: Portra 400, Kodak Gold 200, Fuji 400H, Fuji Velvia 50, CineStill 800T, Ilford HP5+, Ektar 100, Superia 400, Acros 100.
- Cinematic: teal-and-orange, bleach bypass, film noir.
- Lens FX: lens flare, anamorphic streaks, tilt-shift, bokeh.
- Vintage, Mood, Glow, B&W, Color, Texture, Retro FX: the rest of the range, from disposable-camera fade to VHS.
A note on the film names, because precision matters here. Portra 400 in Pressbook is a film-inspired grade, not a scan-accurate emulation. Each one is a hand-tuned stack of Core Image operations, a color temperature, a tone curve, a color matrix, a touch of grain, assembled to approximate that film's character. There are no LUT files and no uploaded assets. The grade is computed from your photo, on your device, every time.
That distinction is why the same filter looks identical in preview and in the exported PDF. The chain doesn't change between the screen and the print.
How a filter is applied
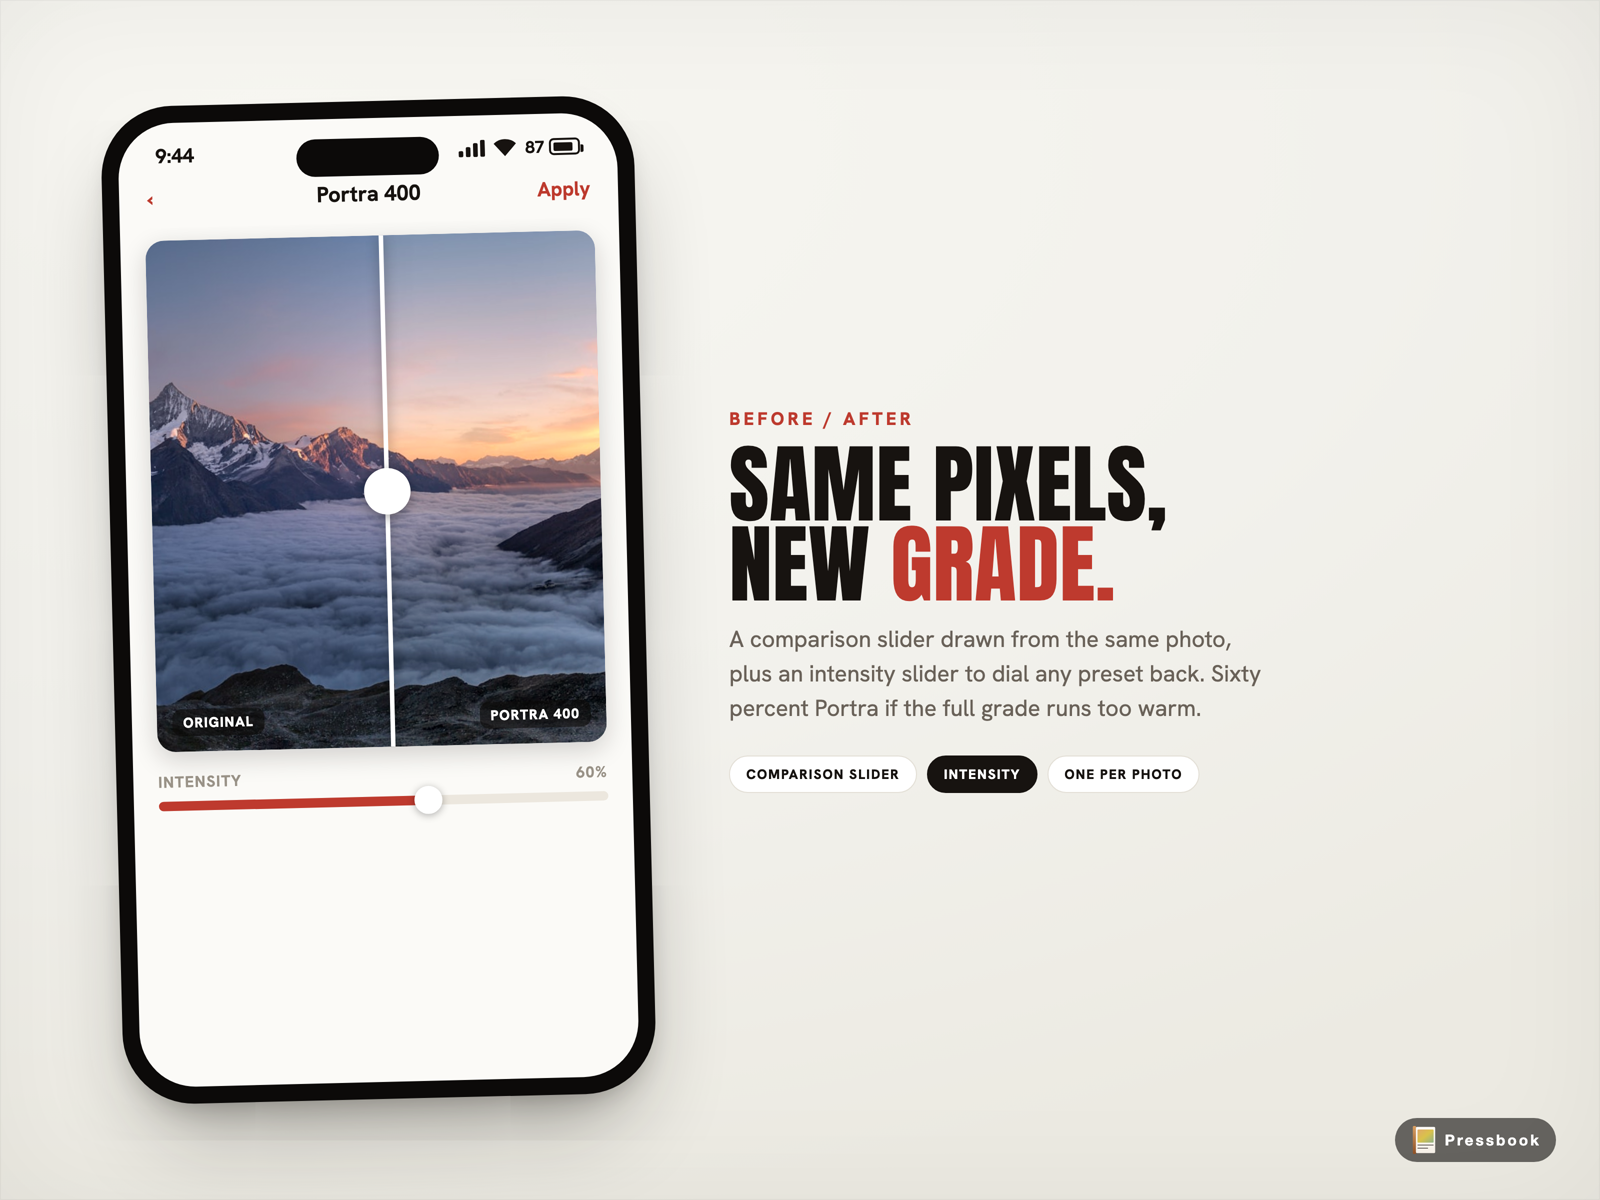
Tap a filter and the editor opens an immersive view with a before-and-after comparison slider. Drag it and you see your original on one side and the graded photo on the other, from the same pixels.
Below it, an intensity slider. Most filters are one-tap presets you can dial back, sixty percent Portra if the full grade is too warm. A few, like Adjust, Tone, Sky Boost, and Film Grain, expose their own parameter panel for finer control.
Apply, and the filter is written to that photo layer. One filter per photo. You can swap it any time.
What Sky Boost is, and what the 'AI filters' are not
Sky Boost brightens a washed-out sky. It's useful and it ships. It is also not a machine-learning model. It builds a soft mask from the top of the frame, restricted to the blue, low-luminance pixels that are probably sky, and boosts saturation and contrast inside that mask. A heuristic, in plain Core Image. It works without any model at all.
This is worth saying directly, because the category names in some photo apps invite confusion. Pressbook does not ship on-device style transfer. There is no anime, watercolor, or oil-paint model bundled with the app. Those exist in the code as planned tags, not as features you can tap today. If and when real on-device style models ship, they will ship as models, not implied by a filter name. We won't dress a color grade up as AI.
The overlay shelf: 32 drawn overlays across 5 sections
Overlays are the physical-world layer: the textures and objects that make a page feel printed rather than rendered. There are 32 of them, in five sections.
- Effects: vignette, light leak, bokeh, dust.
- Frames: film border, film strip, stamp perforation, rough and ripple and doodle edges.
- Textures: crumpled paper, grid paper, scrapbook paper, corner flourish.
- Stickers: camera, flower, leaf, heart, crown, confetti.
- Scrapbook: washi tape, paperclip, sticky note, photo corners, spiral binding, gift bow, postcard, magazine cutout.
Every overlay is drawn, not shipped as an image. A film border is computed from the layer's frame, with sprocket holes spaced to fit. Washi tape is a vector fill. There are no overlay PNGs to download. The overlay scales to your page because it's generated for your page.
How overlays layer
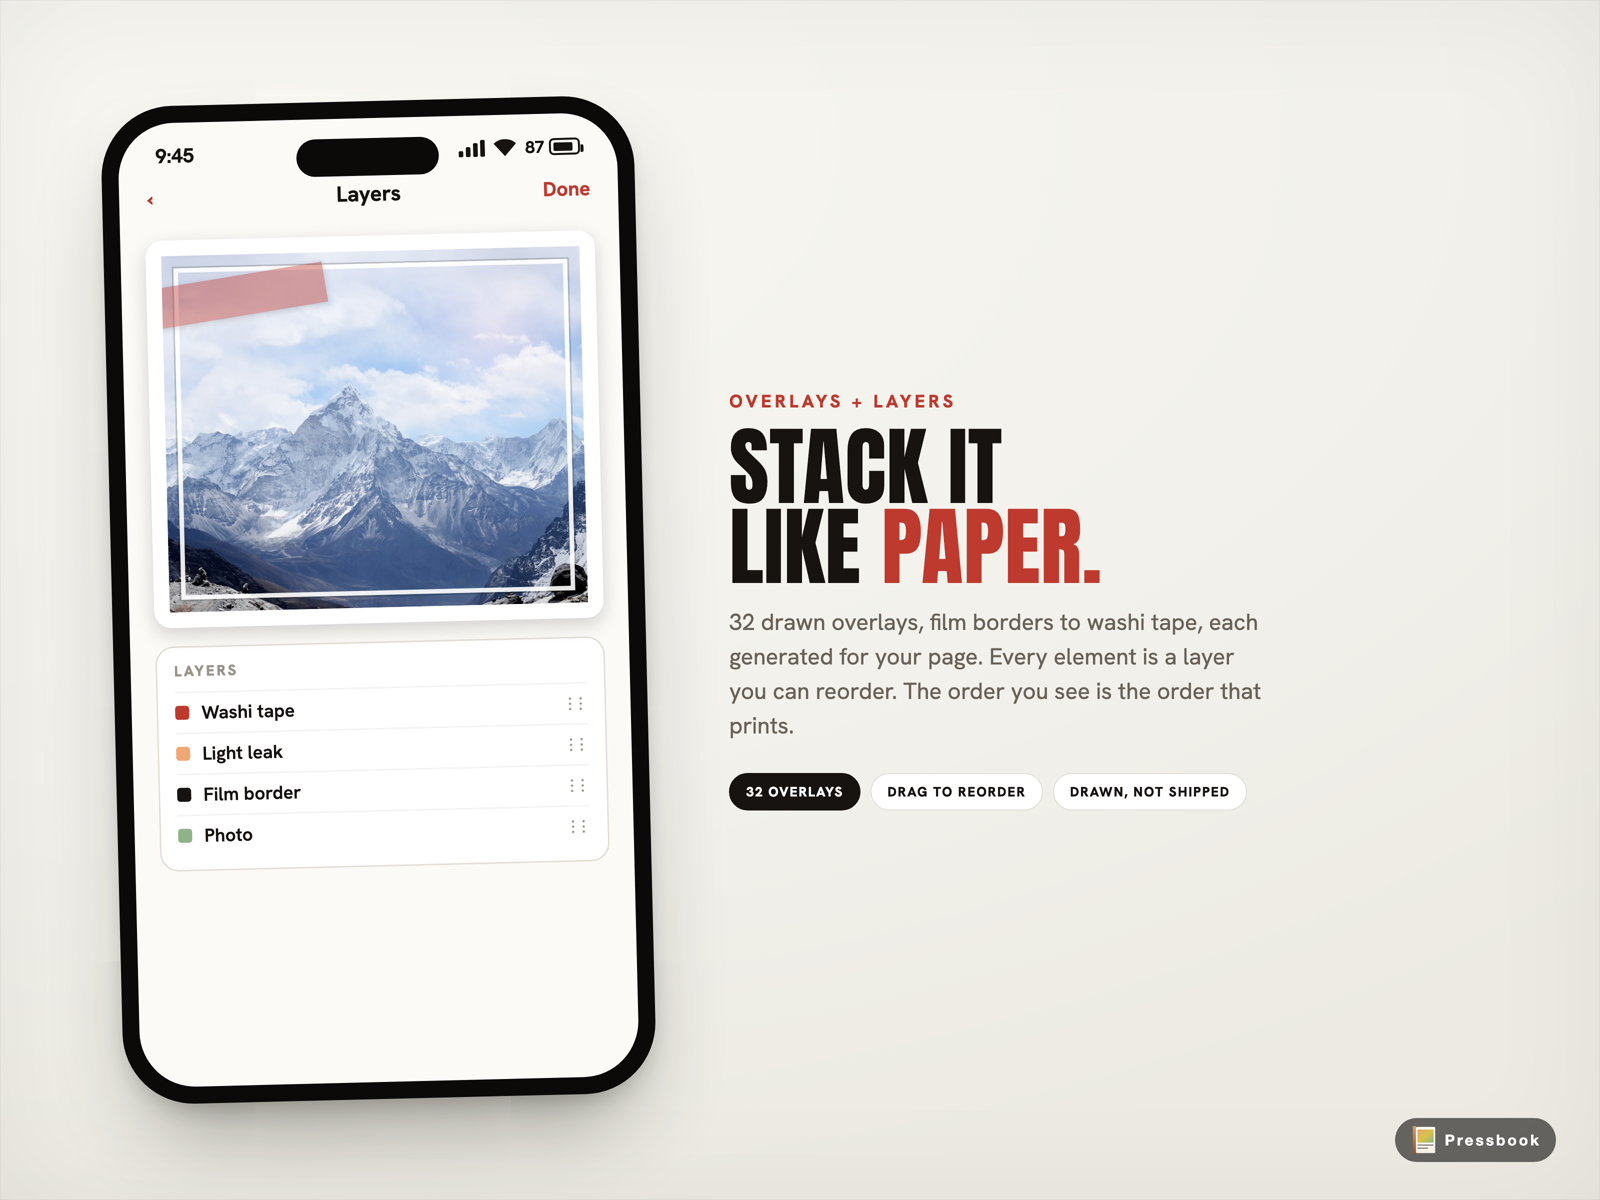
Tap a photo, open Add Overlay, and pick from the grid. One overlay per photo; tap again to swap. Effects, frames, and textures cover the photo. Stickers and scrapbook pieces land as placed objects, usually small in the corner.
Once an overlay is down, a context strip lets you tune it live: opacity, rotation, swap, remove. Film grain at twelve percent. A light leak rotated to sit across the corner. A vignette pulled back to forty.
Stacking is global. Every photo, text layer, sticker, and overlay is a layer with a position in the stack. Open the Layers panel and drag to reorder: put the washi tape over the photo, the text over the tape. The order you see is the order that exports.
The same engine for screen and print
This is the part that quietly matters for quality.
The filter chain and the overlay renderers are the same code path the live preview uses and the same one the PDF exporter uses. When you export at 600 DPI, the renderer applies your Portra grade and your film border to the full-resolution original, not to a downsized copy, not to a re-encoded version. What you approved on screen is what the lab receives.
Everything runs locally through Core Image and SwiftUI. No upload, no server-side compositing, no recompression on the way to the printer.
Try it
Open any photo in a Pressbook album. Try Portra 400 at full strength, then pull it to sixty. Add a film border. Drop a light leak in the corner and rotate it until it sits right. Stack a sticky note. Reorder the layers until the page reads the way you want.
Start an album in Pressbook, free on the App Store.
For the editor's other surfaces, see Curved Text on Photos, Bent Along Any Path and Turn Any Photo Into a Sticker. For the print pipeline these filters feed into, read How to Print Photo Books from Your iPhone at 600 DPI.
The grade you choose is the grade that hits the paper.