How to Add Curved Text to Photos on iPhone
Wrap a name around a portrait. Arc a date across the top of a spread. Run a quote in a full circle around a photo. In Pressbook, a text layer follows a path instead of sitting on a straight baseline, which is the difference between a caption that looks typed and one that looks designed.
It is one tool in the canvas editor, and it does more than the usual "warp" slider, in a few specific ways.

Four path shapes
A text layer can follow one of four paths. Straight is the normal baseline. Arc bends the line into a curve, and you control how much it bows and in which direction. Circle wraps the text around a full ring, sized to fit a photo. And path lets you draw your own line with a finger and run the text along it.
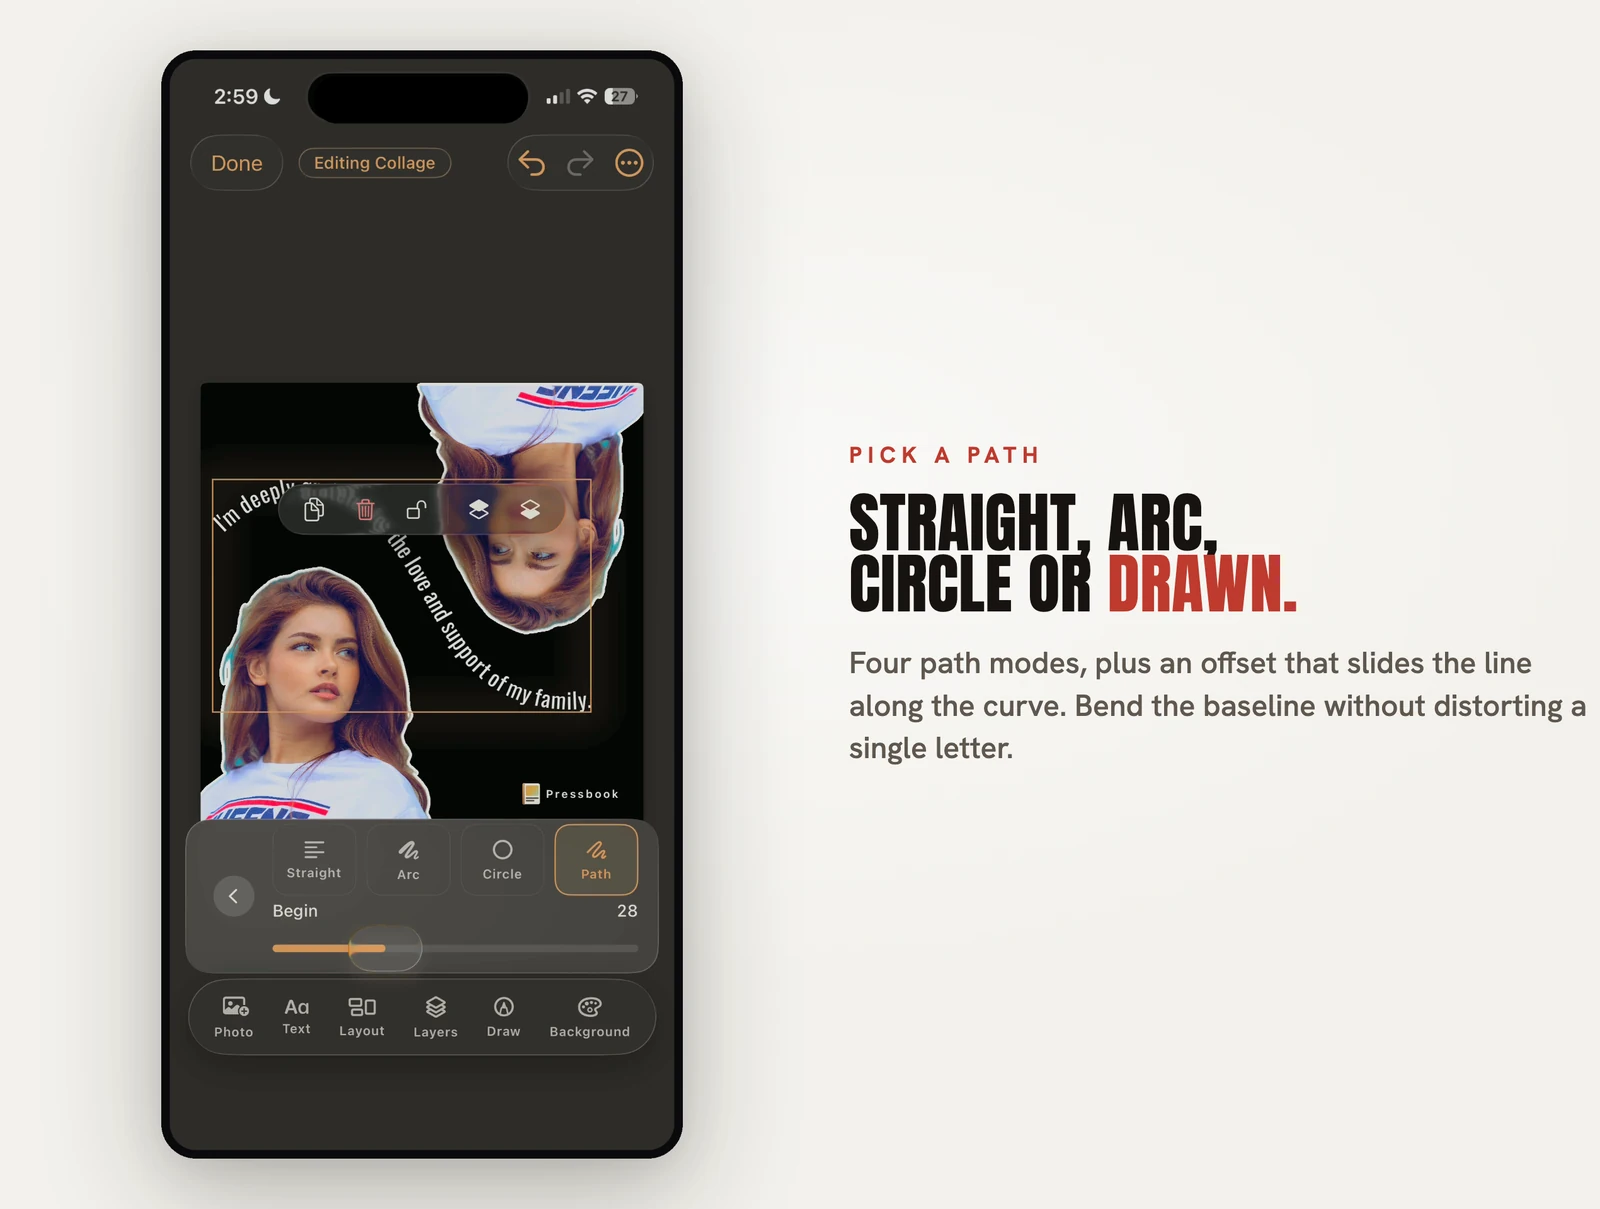
Two controls shape the result. Curvature sets how hard the line bends, from a gentle lean to a tight semicircle. Offset slides the whole line of text along the path, from the start to the end, so you can position a word exactly where you want it on the curve. Between the two, the same arc can hold a short title centered at the top or a longer line running most of the way around a photo.
How the letters follow the curve
The reason curved text in Pressbook looks set rather than stretched is that it is typeset, not distorted. The app uses Core Text to measure each letter's real width, then places the letters one after another along the path so the spacing stays correct as the line bends. The letters are not scaled or skewed to fake a curve; they are positioned on it, each one sitting upright relative to the path beneath it.
Freehand paths get an extra step. A line you draw with a finger is shaky, so Pressbook smooths it with a Catmull-Rom spline that passes through your points, resamples it at even spacing, and runs a light filter over it to round out the jitter while keeping the curve you meant to draw. The text then follows that clean path, evenly spaced even where your finger sped up or slowed down.
Any font, any size
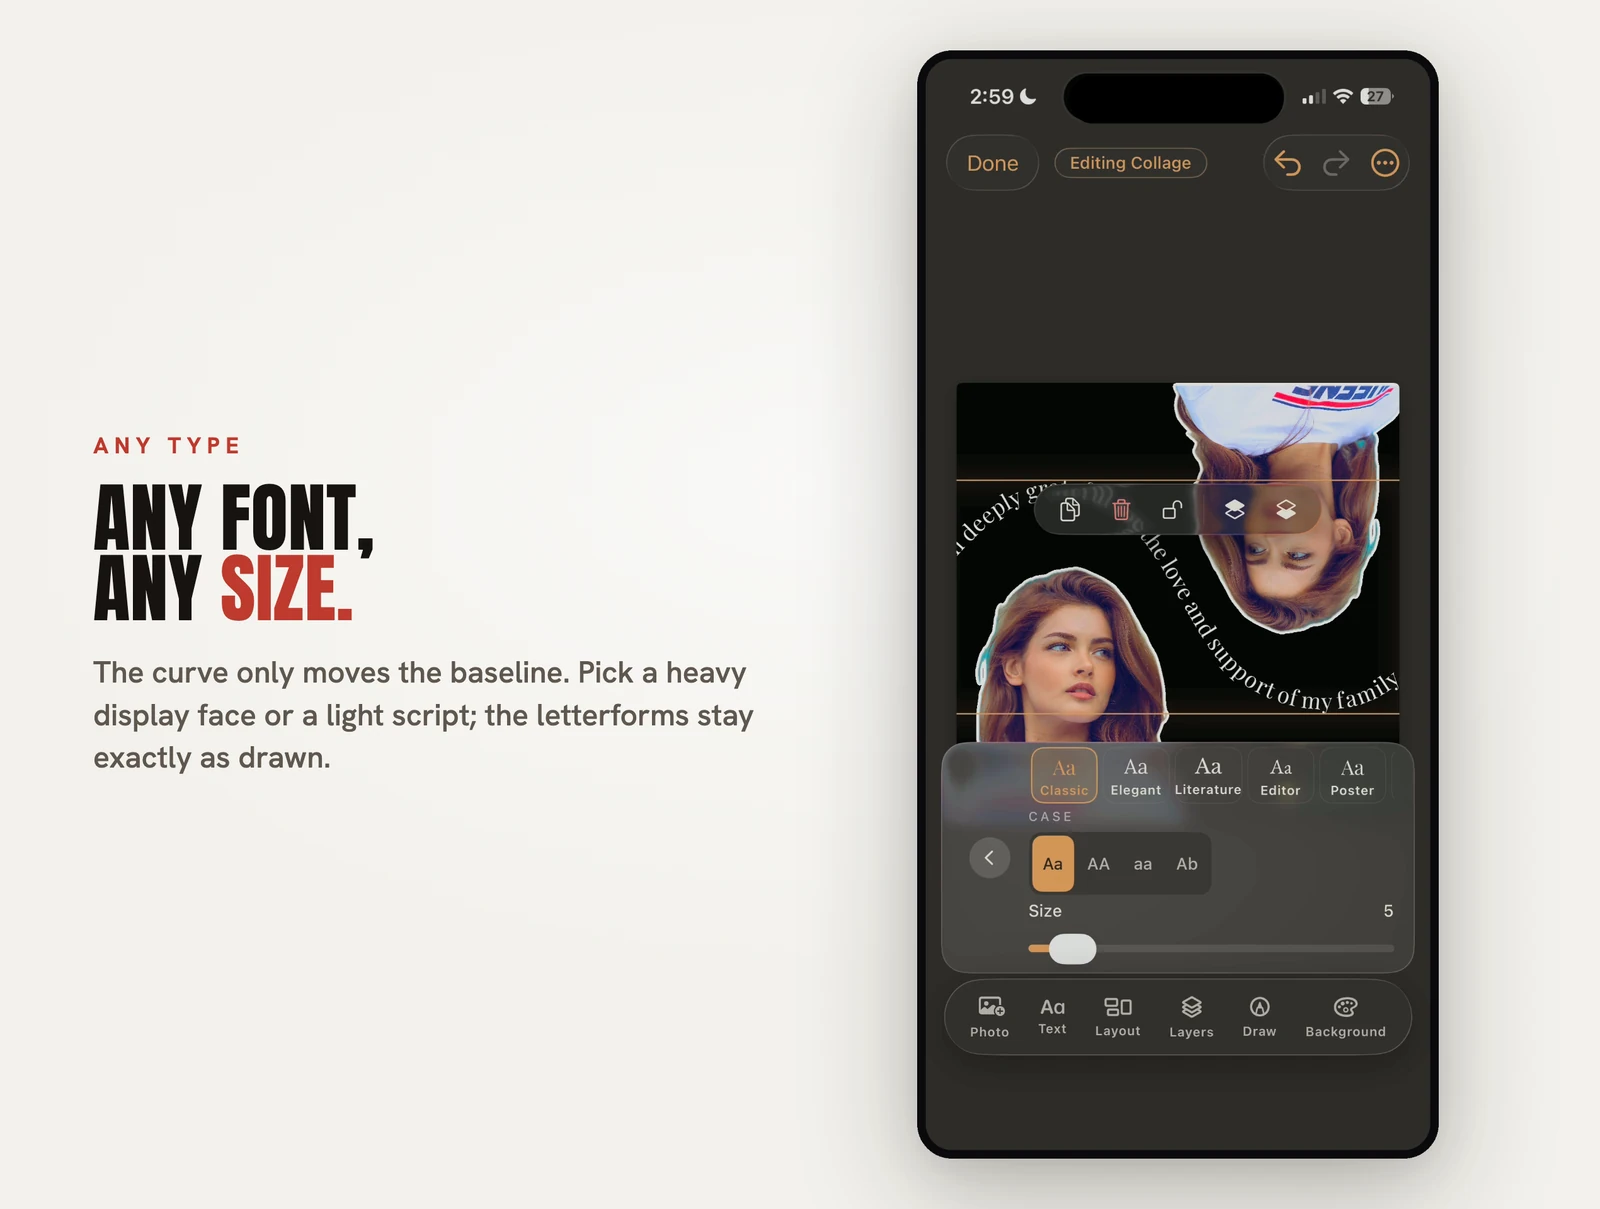
The curve is independent of the type. You pick any font from the library and any size, and bending the baseline does not change the typeface, the weight, or the letterforms. A heavy display font and a light script both curve the same way, because the path only moves the baseline the letters sit on.
Or let it write the words
If you are staring at an empty text layer, Pressbook can draft the line for you. On iOS 26 and later, tap Suggest and the on-device model, Apple's Foundation Models, writes a short caption based on what is in the photo, the scene and the mood. You edit it, then bend it along whichever path you chose. When that model is not available, the app offers a set of written lines to pick from instead.
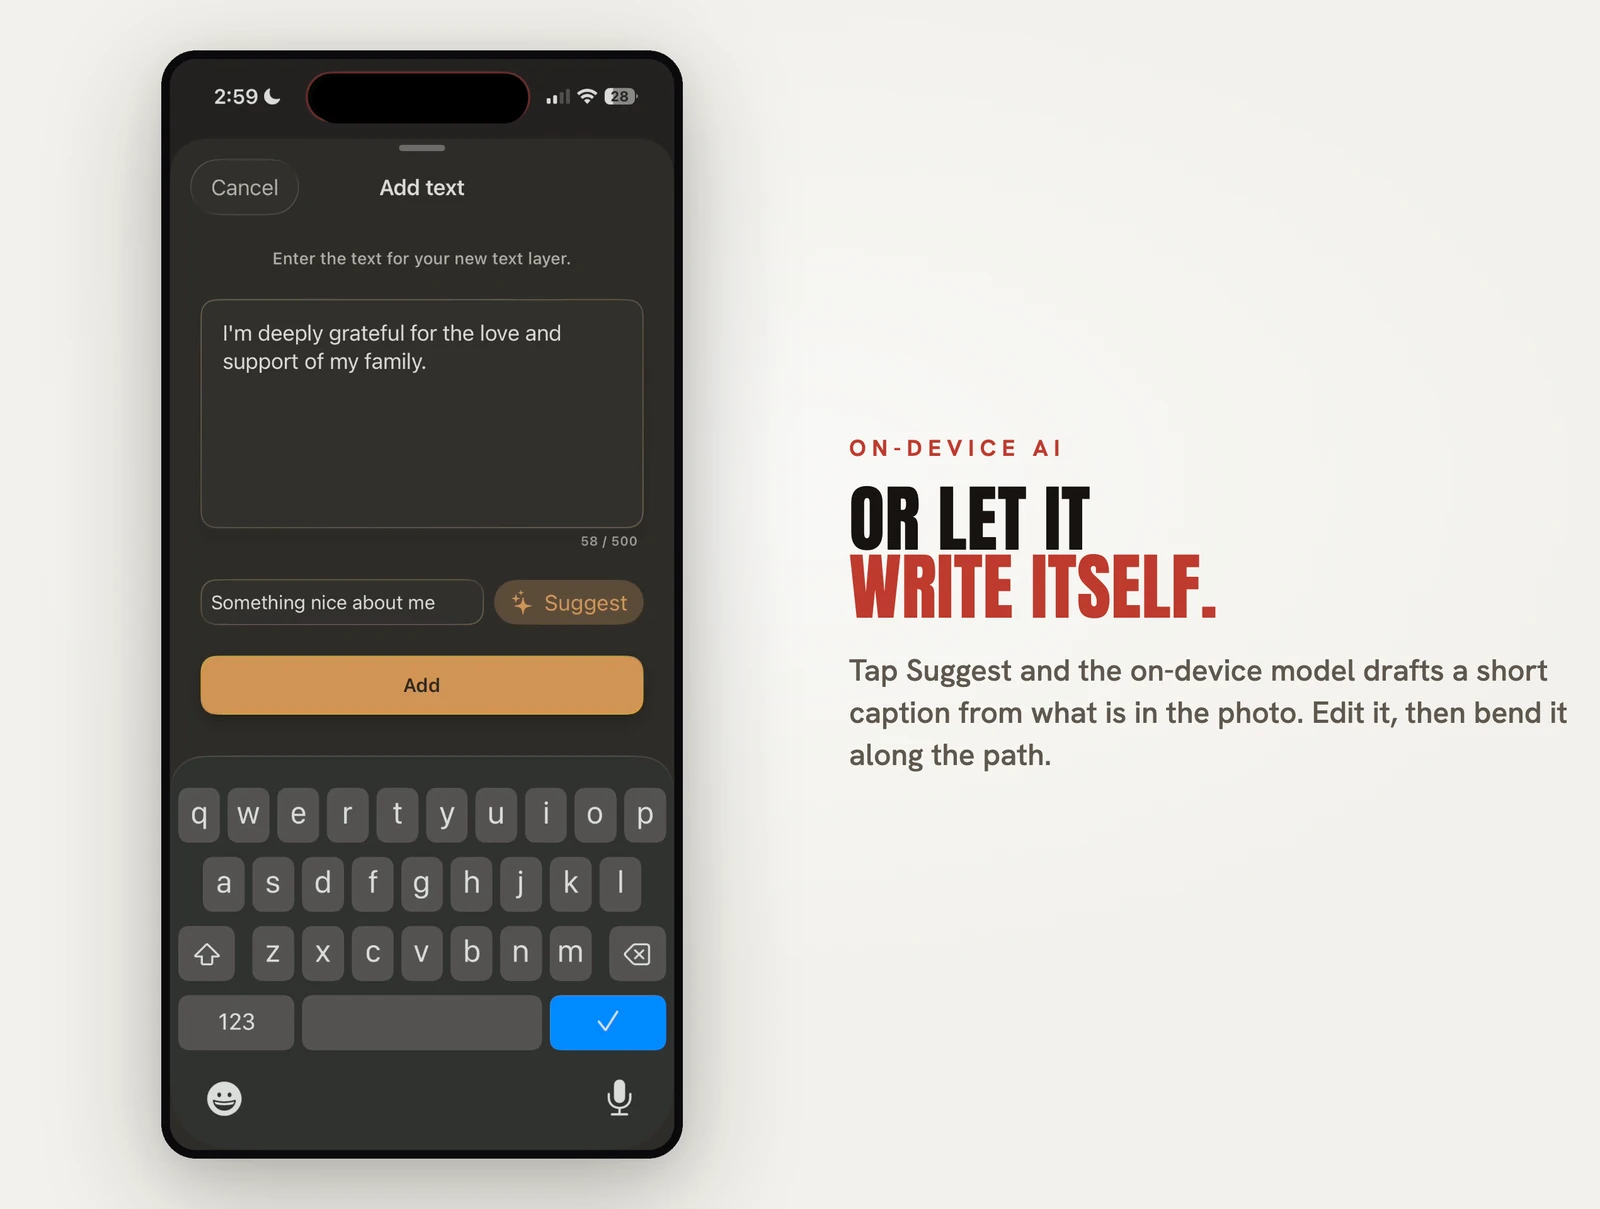
The text is generated on the device. The photo does not leave it to get a caption written, which is the same rule the rest of the app follows. It is the same on-device model that drafts captions for a full album.
On the device, like the rest of the editor
Path generation, glyph placement and caption drafting all run locally. The curved text is part of the same canvas that handles filters, overlays, stickers and Apple Pencil drawing, and none of it depends on a server. It is the same editor you use to fine-tune pages inside a full album. The reasoning behind that is in Why we built SideSwipe Labs.
Try it
Open a photo in the Pressbook editor, add a text layer, and switch the path to arc. Type a date or a place, then drag the curvature until it sits the way you want. While you are in there, try lifting the subject into a sticker and curving a line of text around it.
Start an album in Pressbook, free on the App Store, and bend your first line of type around a photo.